 PanoRyse
Planning a Milky Way shot
Plan a shot walks you through where, when, where to point and which camera settings to use. The Sky Atlas then shows the sky for any place and time, and when the Milky Way core, the Moon and the planets clear your real horizon.
Plan a shot Free
Click Plan a shot in the Night & Astro top bar. It is also on the empty Import screen ("Planning a night out?"), under the astro steps strip and in Help > How planning works, and AI Assist opens it for "plan a Milky Way shot". Every term has a one-line explanation when you hover over it, and nothing goes online.
- Where: allow your saved location, pick a city from the built-in list or type coordinates. Set the clock offset (with a button for daylight saving) and your sky's Bortle class.
- When: a month calendar rates each night good, fair or poor. A good night has an hour or more of full darkness with the galactic core above 10 degrees and the Moon down or under 10 % lit. A small disc shows the Moon's phase. Click a night.
- The night: a timeline with the twilight bands, the Moon and the core's altitude, and the best window. Click the timeline to choose a moment.
- Where to point: a compass, an altitude gauge and the tilt of the Milky Way band. Show in 3D opens the Sky Atlas's Earth & Frustum view with your lens.
- Camera settings: the NPF and 500 rules, the limit with a tracker, ISO and aperture hints, and how many frames to take for a stack or a panorama.
The planner's Tracker guide covers finding the pole (Polaris in the north; the Sigma Octantis region from the Southern Cross and the Pointers in the south), polar alignment with tonight's polar-scope clock, balance, a drift check, and the exposure limits for your polar error, with notes on eight popular trackers and Raspberry Pi based mounts. All tracker guides are free.
AI Assist and the MCP server plan with panoryse_plan_best_nights, panoryse_plan_night_timeline and panoryse_plan_pointing.
The Sky Atlas
Open it from Night & Astro > 3D View > Sky Atlas. The view tabs are Earth Sky, Earth & Frustum and Cosmos. The terrain horizon, tracker logs and satellite passes belong to Night & Astro Pro.
1. Set the place and the time
- Enter the latitude and longitude of where you will shoot, or open a photo and use its own time and place.
- Set the date and time. The Earth Sky redraws at once: stars, constellations, the Milky Way, the Moon and the planets as seen from there.
- Drag to look around and scroll to zoom. Search for an object by name ("Sgr A*", "M42", "Saturn") to centre on it.
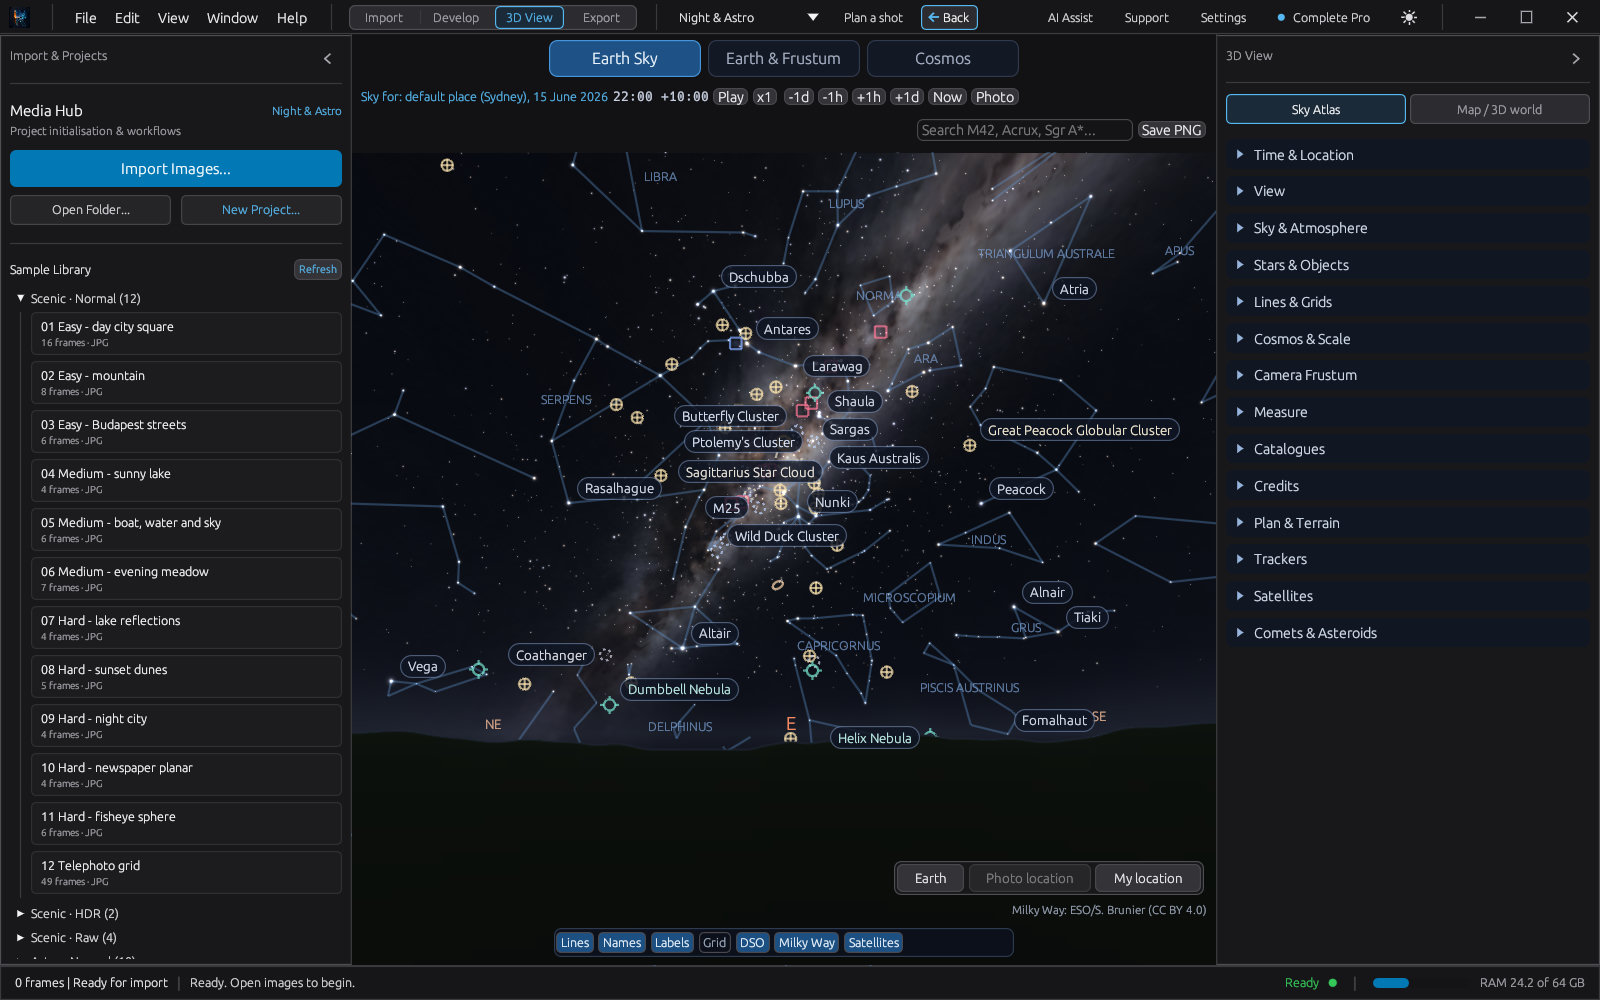
My location uses your computer's location, and asks for your consent the first time. Go to Earth brings the view back to the horizon from anywhere.
2. Fetch the real skyline
- Open Plan & Terrain in the inspector and press Fetch terrain horizon.
- PanoRyse asks before it sends the place to the terrain server (AWS Terrain Tiles). Allow it.
- The real skyline of about 30 km around you becomes the ground of the Earth Sky. Look towards hills or mountains to see it.
3. Read the Plan list and the timeline
The Plan list says when the Milky Way core, the Moon, the planets and the selected object rise above your skyline and set behind it. The night timeline under it is clickable: click a moment to move the atlas to that time and see the sky as it will be.
Ask AI Assist. Type "plan a shot of the Milky Way core", "I want to photograph M31" or "when is the best night for Orion". The reply lists the best nights; press Night 1: set the atlas to jump there. If you have not allowed location, it asks for your town.
4. Frame the shot
In Camera Frustum, tick Aim, sensor and lens entered here and enter where you will point (RA and Dec, or altitude and azimuth), the sensor (for example Full frame) and the focal length. The atlas draws the field of view:
- on the 2D sky in Earth Sky, so you can see what fits in the frame;
- as a pyramid from your place in Earth & Frustum and the Cosmos, with your photo on its far plane once you have taken it.
With a plate-solved photo, Use the plate solution draws exactly what the photo covers. Measure gives the distance and angle between two objects.
5. Set up a star tracker
- Open Trackers and pick your tracker. The section has set-up and polar-alignment steps for eight trackers, including the Star Adventurer, the SkyGuider and Raspberry Pi based mounts. (For the general steps, the planner's Tracker guide above is quicker.)
- The reticle shows where the pole star sits in the polar scope for the atlas time; change the time and watch it turn.
- Enter your polar error and exposure to make a tracker log for an image set. When you stack, its motion limits guide the alignment.
6. Satellites, moons and comets
- Satellites: Download fetches current orbital elements from CelesTrak (only when you click; elements older than 14 days are refused). The next passes appear in a list; click one to move the time to it and see its path across the sky.
- Comets and asteroids: Comets & Asteroids > Download fetches orbits from the Minor Planet Center; the selected one shows its path over two months.
- Moons: zoom in on Jupiter, Saturn, Mars, Uranus or Neptune in the Earth Sky to see their moons at their computed places.
- Objects not in the catalogue: type the name and press Look up online (CDS Sesame). You can turn this off in Settings > Online Services.
7. The Cosmos view
The Cosmos puts the Solar System inside a model of the Milky Way. Scroll out from the Earth past the planets, the Oort cloud and the nearby stars to the spiral arms, then the Magellanic Clouds, Andromeda and Triangulum. Distances are logarithmic around the centre of the view by default; tick True scale to see real sizes.
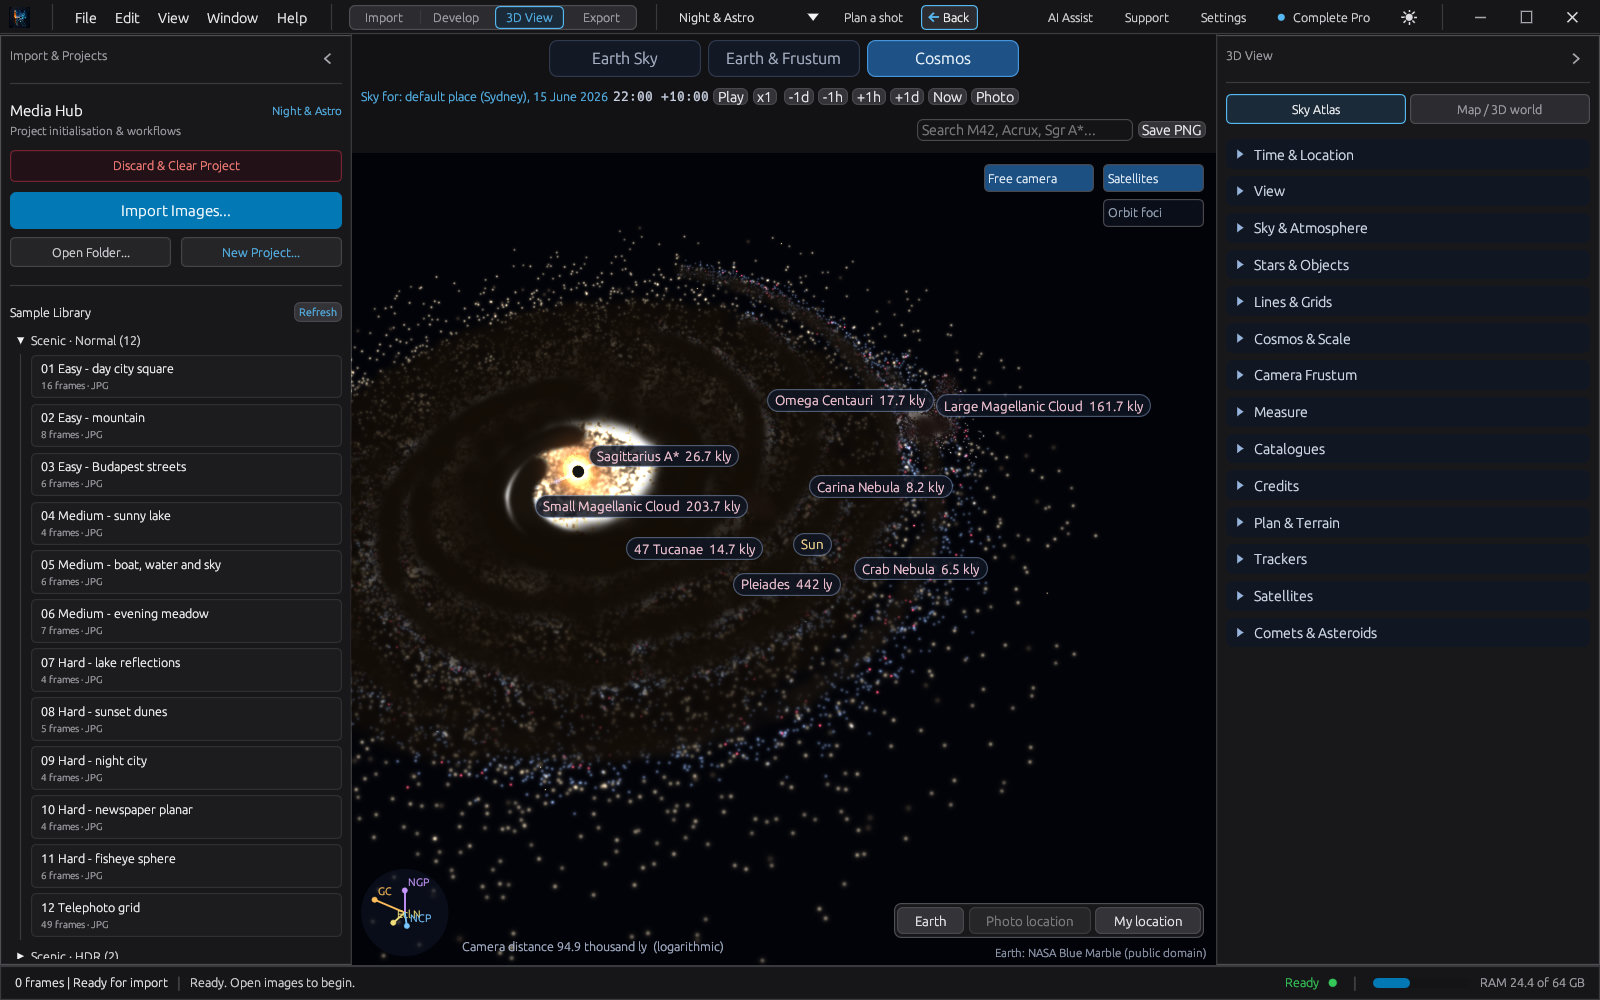
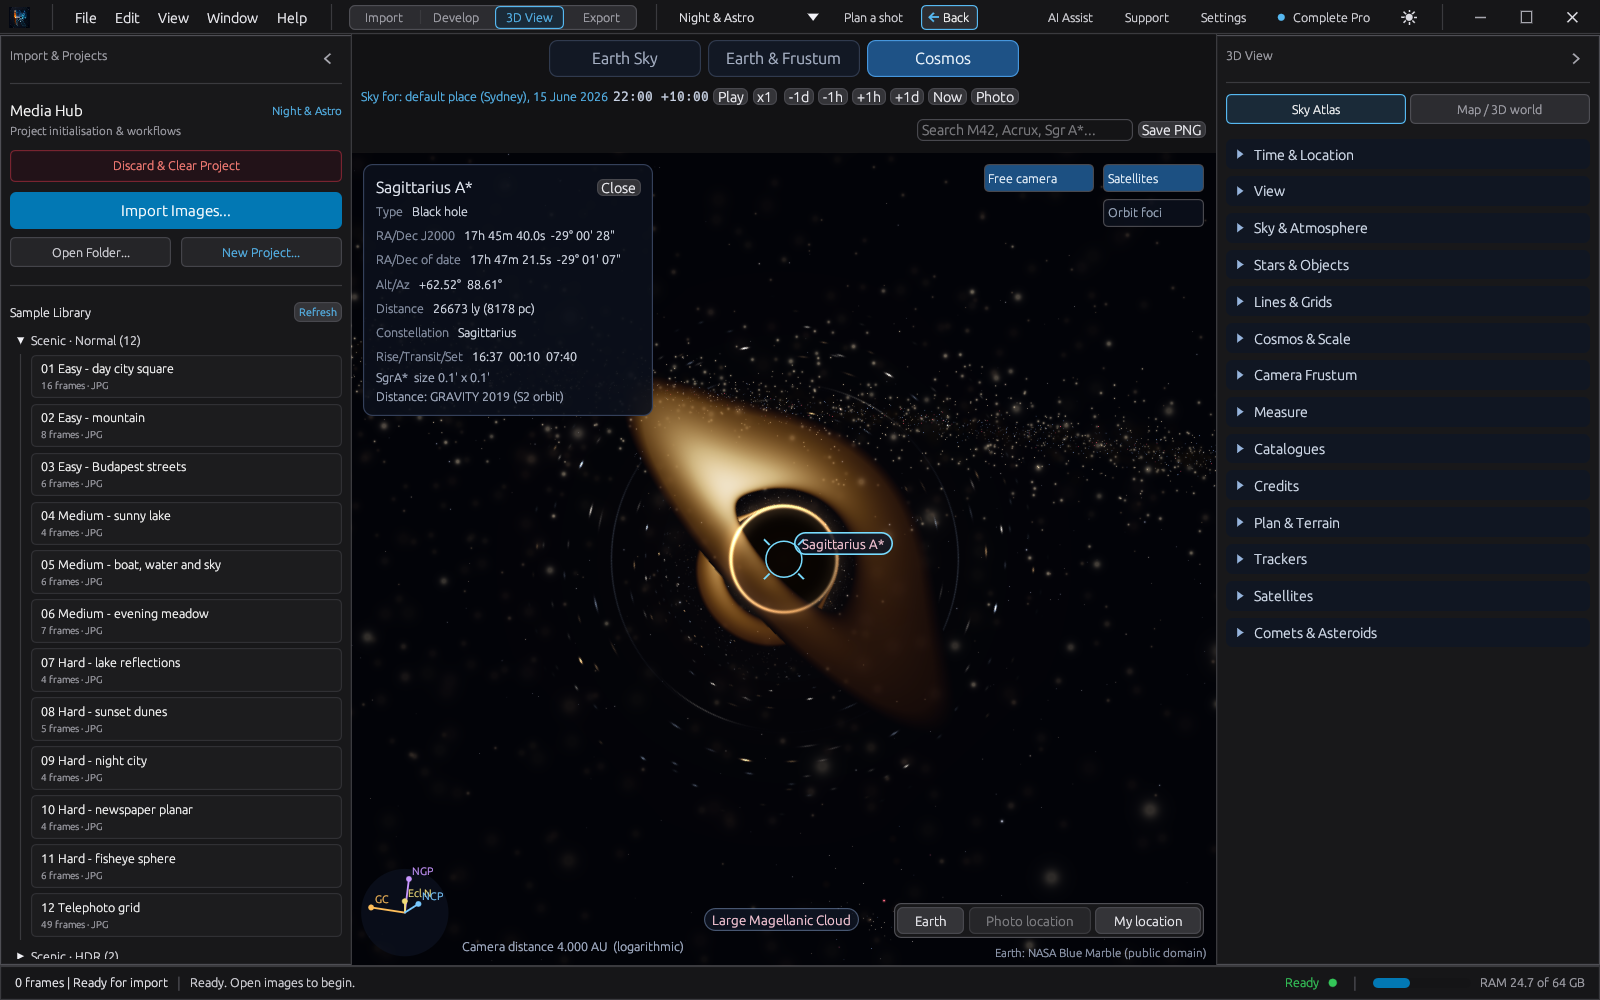
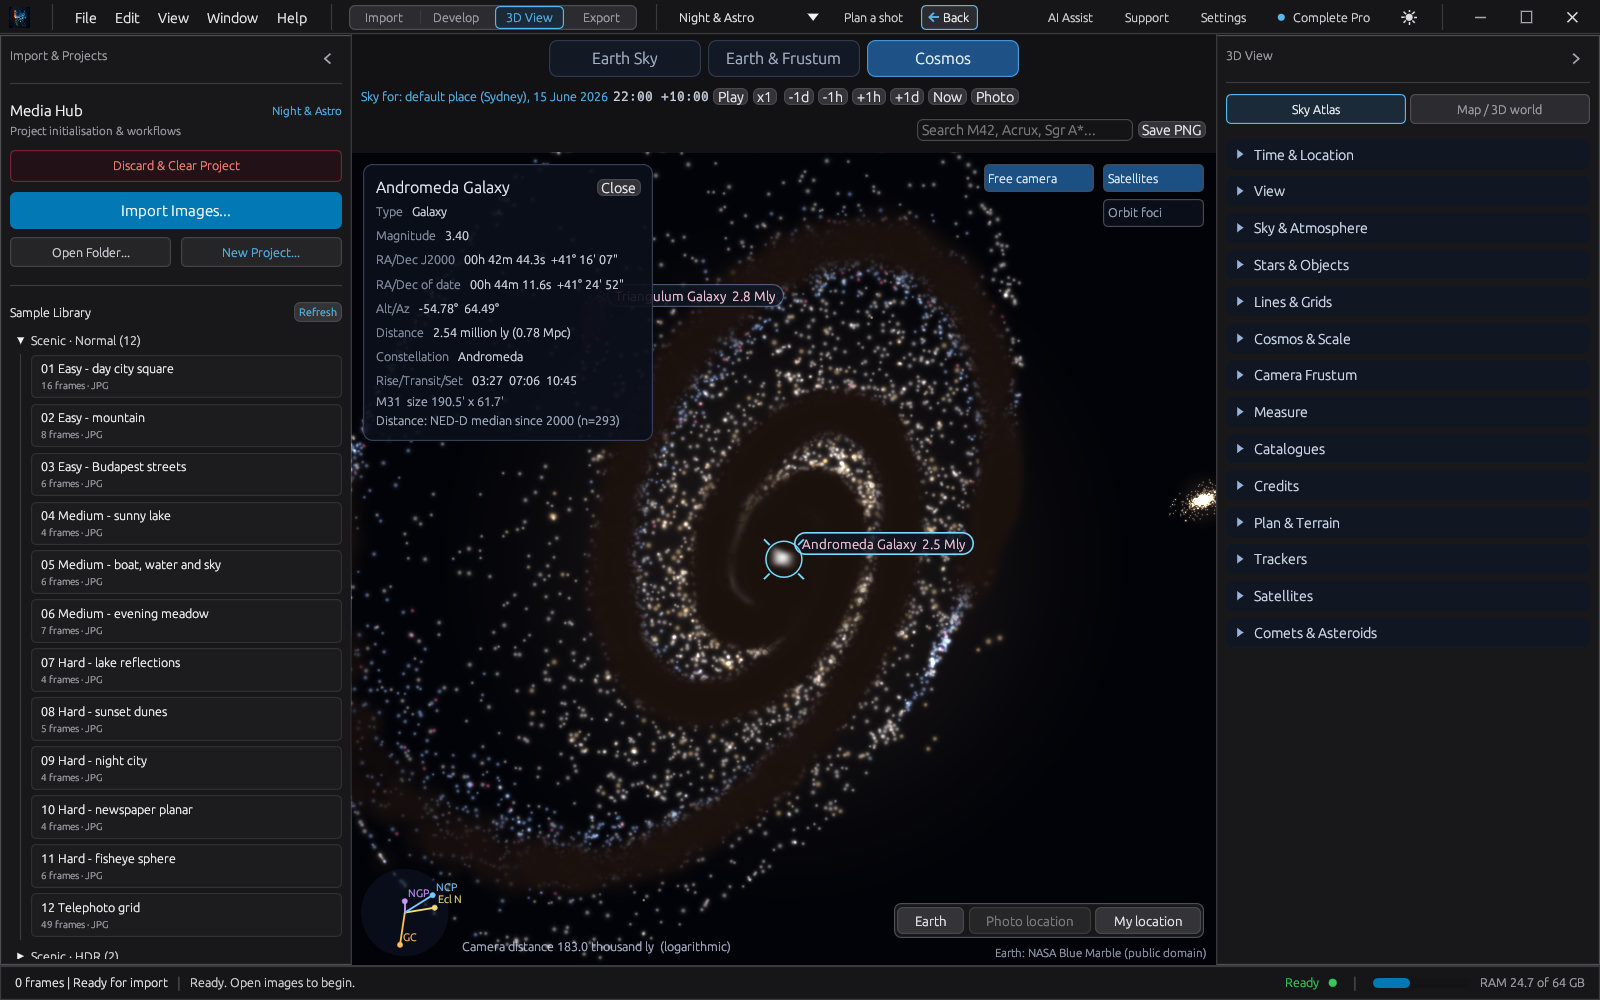
Fly to Sgr A* to see the black hole at the centre of the galaxy, with its shadow, photon ring, bent accretion disc and the background stars lensed into arcs. Nebulae such as the Pillars of Creation, Orion, the Ring and the Crab are drawn as glowing volumes when you fly to them.
Coming soon: picking the place on a map, with place-name search, in the planner; satellite passes and timing advice in the planner.