 PanoRyse
Layers and masks
Develop has two kinds of layer. Picture layers hold pixels (the photo, a starless image, another picture). Adjustment layers hold settings, limited by a mask. Both work on panoramas and single photos.
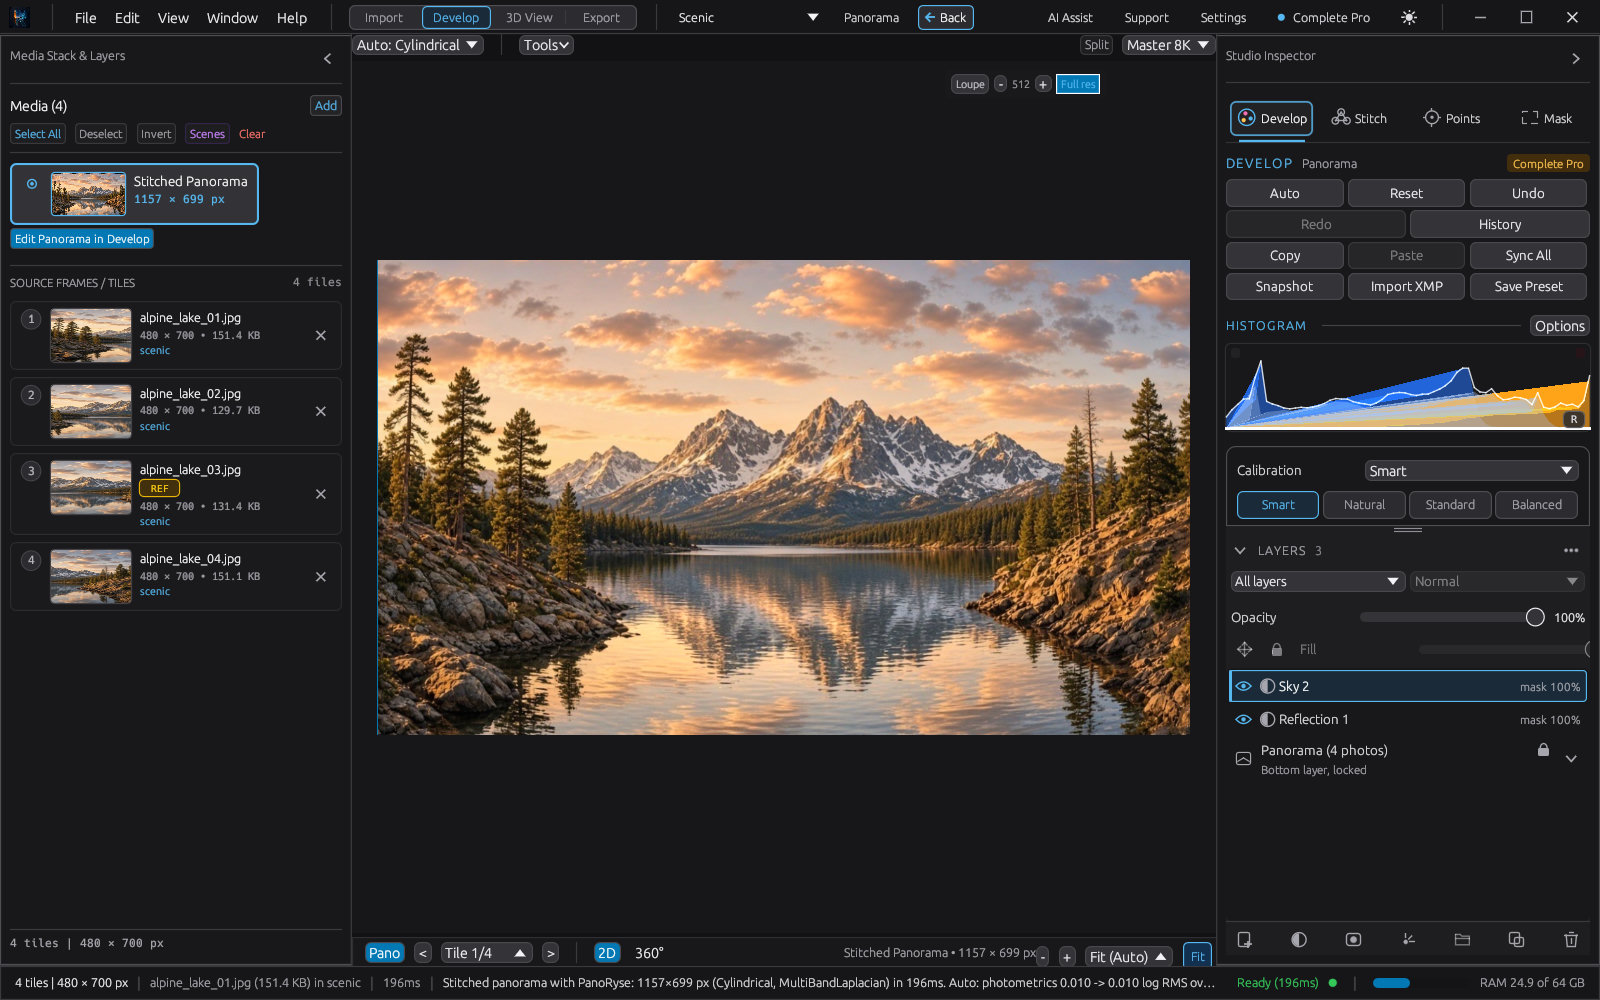
How the Develop inspector is arranged
- Header: Undo, Redo and History; Auto and Reset; Copy, Paste, Snapshot, Import XMP and presets.
- Histogram, with the calibration card.
- Image Layers: the picture layers.
- Layers: the adjustment layers, with Base pinned at the bottom.
- Adjustments: "Editing: <layer>", what the layer is, its opacity, then its panels.
Every slider edits whatever is selected: a layer's own settings, or the whole picture when Base is selected. Until you select something the zone says "Select Base or a layer".
Picture layers
Image Layers lists the pixel layers from top to bottom. Each row has an eye, a thumbnail, a name, an opacity and a blend mode: Normal, Screen, Lighten, Multiply, Overlay, Soft light or Linear dodge (add).
- Add a picture: Add > Image from file... puts another image on a new layer.
- Edit one layer only: click the layer. Every Develop panel now edits that layer alone ("Editing: Starless layer"). Click Global (whole picture) to edit the whole picture again.
- Arrange: drag rows to reorder; the right-click menu renames, duplicates, hides or deletes. Double-click a name to rename it.
- Mask a picture layer: select it and press Edit mask.... The Mask panel opens on "Mask of the <name> layer"; press Done when finished.
- Flatten bakes the visible layers into the photo. You do not need to flatten before exporting: exports use the layers automatically.
- Collapse (in the Image Layers heading) shows only the selected layer in one row; Expand brings the list back.
Star separation in Night & Astro adds a Starless and a Stars layer this way; see the astro tutorial.
Adjustment layers Scenic Pro
- In the Layers zone press New Layer and pick a type.
- The new layer starts with no change. Its panels open in Adjustments, together with Mask.
- Set the layer's opacity, then paint or generate its mask (below).
| Layer type | Its panels |
|---|---|
| Light & Exposure | Basic, Mask |
| Colour (colour balance) | White Balance, Mask |
| HSL | HSL, Mask |
| Colour Grading | Colour grading wheels, Mask |
| Tone Curve | Tone Curve, Mask |
| Photo Filter, Local Contrast, Detail, Vignette | Layer Properties, Mask |
Adding, deleting, duplicating, renaming and hiding a layer are each one undo step, and so is every slider drag.
Masks
The Mask panel is the same wherever you use it: on an adjustment layer, on a picture layer's own mask, and for the star separator's refine brushes. It offers:
- Brush with size, hardness, and add or erase; the same cursor and shortcuts everywhere.
- Linear gradient and radial shapes.
- Mask Sky and Mask Subject. Subject masks use the optional subject model pack.
- Depth range, using the optional depth model pack (which also powers lens blur).
- Colour range and luminance range.
- Pixel brush and selections.
Mask, curve and colour-picker edits are one undo step each, recorded when you release the mouse.
Ask for a mask. AI Assist understands requests such as "select the sky", "mask the people" or "select everything nearer than 10 m" and builds the selection for you; see AI Assist.
Layers in Photoshop
Export as Photoshop PSD (or PSB for very large files) and every picture layer becomes a real Photoshop layer with its name, visibility, opacity, blend mode and mask. Masked global adjustments arrive as baked layers named "<name> (adjustment, baked)". Opening a PSD or PSB brings its layers back into Image Layers. See Round trips for the details.
History and snapshots
- Ctrl+Z, Ctrl+Shift+Z and Ctrl+Y work everywhere except while you type in a text box (there they undo the text).
- Edit > History... or the History button lists the steps; click one to go back to it.
- Snapshot keeps a named version of the develop settings. File > Version History... keeps whole versions of a saved project.