 PanoRyse
Getting started
PanoRyse is one program for 64-bit Windows. It needs no runtimes, keeps its settings beside itself when you use the portable folder, and works offline.
What you need
- Windows 10 or 11, 64-bit.
- A graphics card with OpenGL, or DirectX 12. Without a graphics card PanoRyse still runs on Windows' software renderer (slower, but complete).
- Memory: 16 GB is comfortable for panoramas of a few dozen 24-megapixel frames. Larger sets load as smaller working copies (proxies) and the full-resolution file is rendered from the originals when you export.
Install or unzip
Download coming early December 2026. The release is not published yet. The download page will have it.
- Portable folder. Unzip the PanoRyse folder anywhere you can write to, for example
D:\PanoRyse. Double-clickPanoRyse.exe. Nothing is installed elsewhere: the fileportable.txttells PanoRyse to keep its preferences, licences and journals in that folder. - Or the installer, if the release offers one: it installs to
C:\Program Files\PanoRyseand keeps your preferences and licences in%APPDATA%\PanoRyse. - The first time you start it, Windows SmartScreen may ask whether to run an app it has not seen often. Choose More info > Run anyway only if you downloaded PanoRyse from its official page.
What is in the portable folder
| Item | What it is |
|---|---|
PanoRyse.exe | The application. Launch_PanoRyse.bat starts it too. |
models\ | Optional data packs, loaded automatically at start-up (see below). |
assets\ | Icons and the credits and licences of the bundled data (lens profiles, star catalogue and so on). The data itself is built into the program. |
portable.txt | The portable marker: preferences, licences and the crash-recovery journal stay beside the program. |
The models folder and data packs
PanoRyse works without any pack. Packs add optional data; you install them from Settings > Models & Data Packs, or put the files in a models folder beside PanoRyse.exe. Each file is checked before it is used.
| Pack | File | What it adds |
|---|---|---|
| Deep star catalogue | panoryse_deep_stars.bin | Tycho-2, about 2.5 million stars to magnitude 13 (25 MB). Plate solving of telescope and long-lens fields under 6 degrees when you give an approximate centre. The built-in Hipparcos catalogue already solves wider fields. |
| Learned star remover | panoryse_star_remover.prw | PanoRyse's own trained network for star separation (2.4 MB). The classic engine stays the default; see star separation. |
| Depth model | panoryse_depth_anything_v2_small.prml | Depth masks and lens blur in Develop. |
| Subject model | panoryse_u2netp_salient.prml | Mask Subject. |
| Depth grid | panoryse_depth_grid.bin | Moves the photo surface in the 3D View. |
Astronomical catalogues for the Sky Atlas (and refreshed plate-solving catalogues) are downloaded from inside the app on request, from Settings > Models & Data Packs. Nothing is downloaded without a click.
The section lists every pack with its state (found or missing, where it was found and its size). To add one:
- Open Settings > Models & Data Packs.
- Click Install pack from file... and choose the pack file. PanoRyse recognises it, checks that it loads and copies it into the
modelsfolder for you. - Or copy the file into the
modelsfolder yourself and press Rescan.
The first start
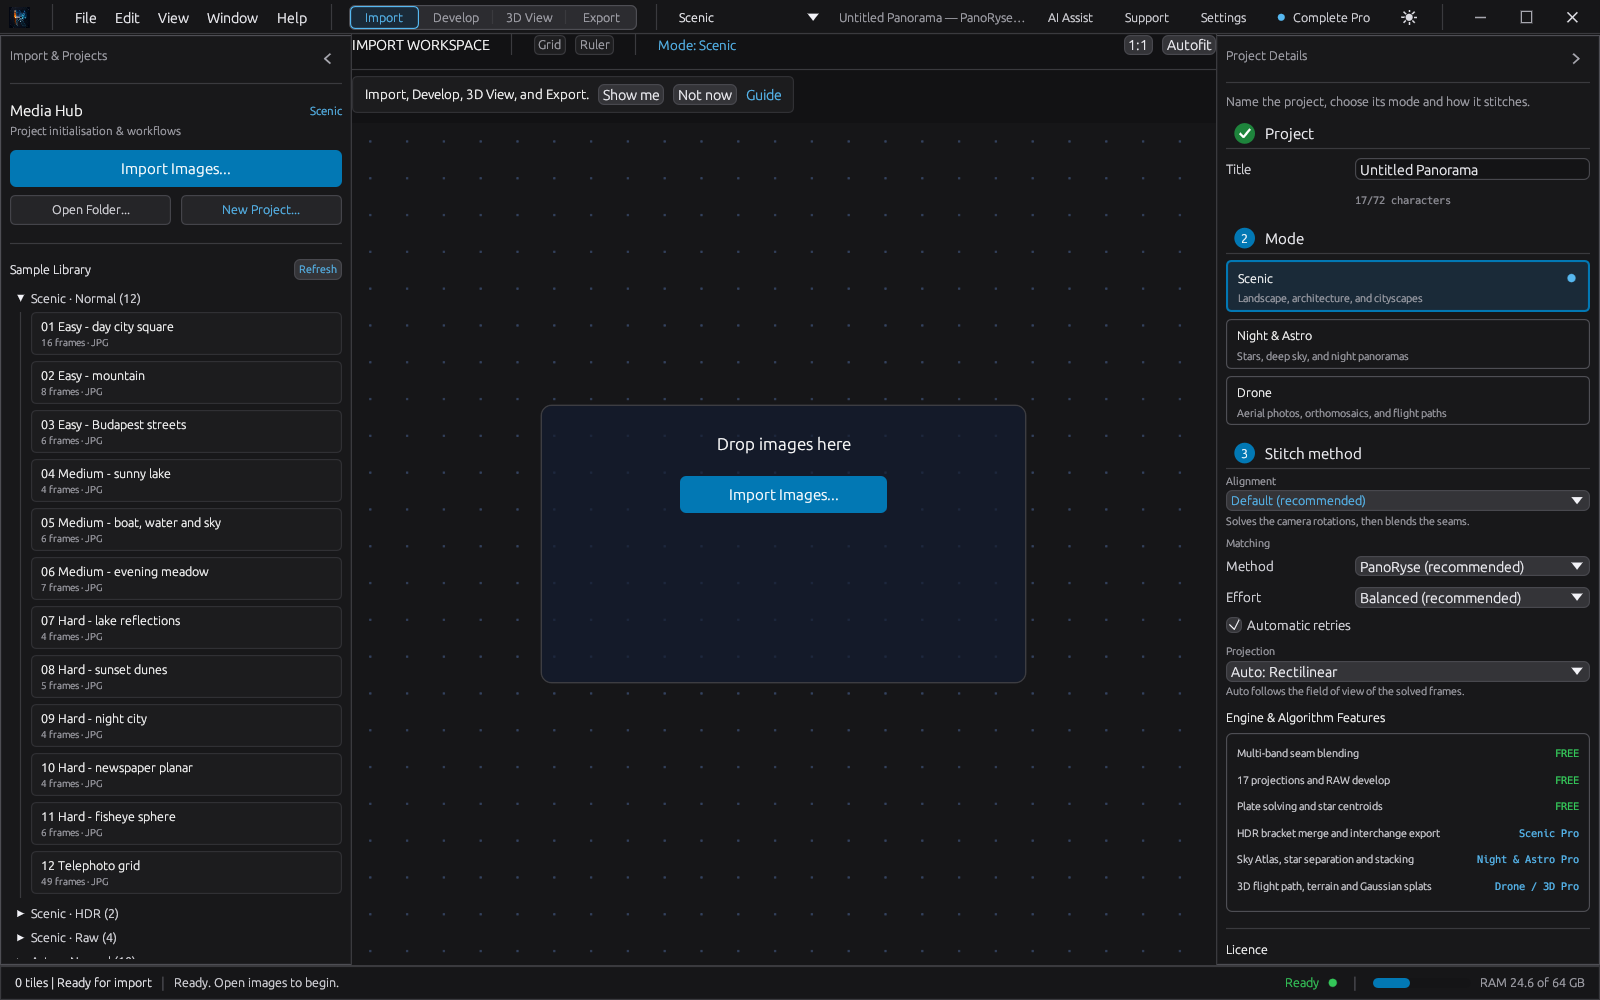
- PanoRyse opens on the Import tab. On the right, choose the mode: Scenic (landscapes, architecture, cities), Night & Astro (stars, deep sky, night panoramas) or Drone (aerial photos, orthomosaics, flight paths). You can change it later from the top bar.
- Click Open Image Files... or Open Folder..., or drag photos onto the window. PanoRyse reads JPEG, PNG, TIFF, WebP, Radiance HDR, OpenEXR, FITS, PSD and PSB, and camera raw files (CR2, CR3, NEF, ARW, RAF, DNG and many more).
- PanoRyse looks at what you imported and decides once what it is: one photo, separate photos, a panorama, several panoramas, an astro stack or an astro mosaic. The chip on the top bar shows the kind; click it to change it.
- Prefer a lighter or a plainer look? The sun and moon button at the top right of the title bar switches to the Light or Dark theme; Settings > Appearance has all three, PanoRyse Default included.
- Continue with Your first panorama or Editing separate photos.
Licences and trials
The free core works without a licence. To try a Pro segment, open Settings > Licences & 14-Day Trial (or click the licence button on the top bar) and start that segment's trial. When you buy a licence you receive a licence file: click Load licence file... in the same section. The file is verified on your computer and copied into the PanoRyse data folder; nothing is sent anywhere.
Updates
Help > Check for Updates... asks the release server whether a newer version exists. It runs only when you click it, or at start-up if you tick Check for updates when PanoRyse starts.